Contents
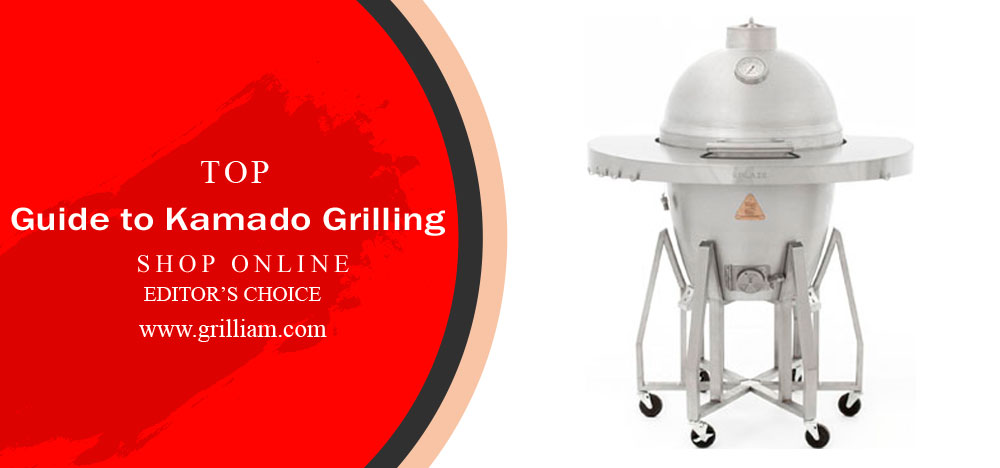
Big Egg Style: A Simple Guide for Beginners
I think I’m not exaggerating when I say that most people absolutely love freshly grilled or smoked meat. There are a few exceptions, of course, like people who don’t eat meat at all. However, those who do must also adore barbeques. That’s why we are so desperate to go to the restaurants and cafes for a new portion of freshly grilled nourishments.
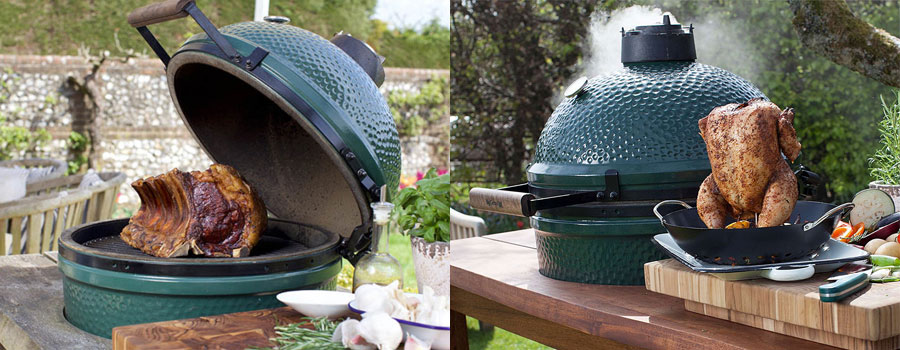
And that’s why it’s so amazing to have a Kamado grill at your home. I know that the thought of cooking yourself using Kamado may sound complicated. It may be even a little mysterious. Obviously, these grills significantly different from other charcoal grills you may have used before. Either way, I assure you that it’s very easy to learn how to cook using them. All you need is some practice, as well as some wood and charcoal.
If you are longing to cook delicious cuisine at home, or if you already got a grill like this and are now eager to start barbecuing with it, this article is for you. Today, I want to introduce you to Kamado grilling and give you a detailed rundown on how to cook with it.
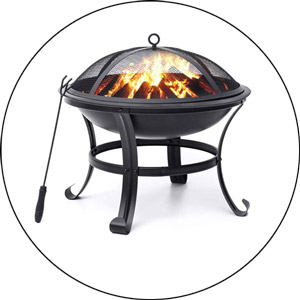
What is a Kamado Grill
The term “Kamado” originates from Japan and dates back more than 3000 years. It means a cooking vessel that uses charcoal and wood to produce cooked food. In the usual meaning of the word, Kamado grills should be ceramic. However, nowadays, you can get a cheaper aluminum or stainless steel version that will get the job done. Modern Kamados can be used to grill, bake, smoke, sear, as well as cook pizza. Additionally, you can find myriads of recipes for each and every type of cooking I listed above on the Internet. As I love to say, the possibilities are (almost) endless!

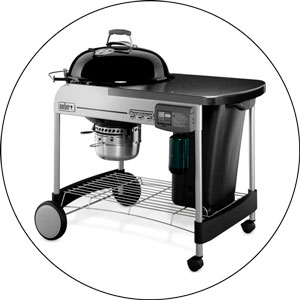
Choosing a Stove
The price range for these products starts at around the $100 mark and rises to a couple of thousands of bucks. Depending on your budgetary constraints, you can choose either a more affordable aluminum or stainless steel Kamado or opt for an expensive ceramic grill. The ceramic one offers better durability, as well as temperature retention and control.
I recommend trying out cooking on a cheaper stove. In case you like Kamado grilling, you can replace your grill with an expensive ceramic variant. Even though the price can bite, if your budgets allow for it, it should provide you with a better cooking experience, and it’ll last you many years.
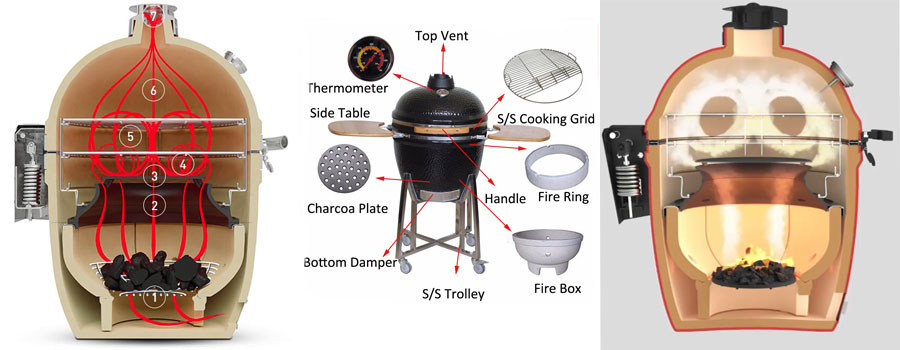
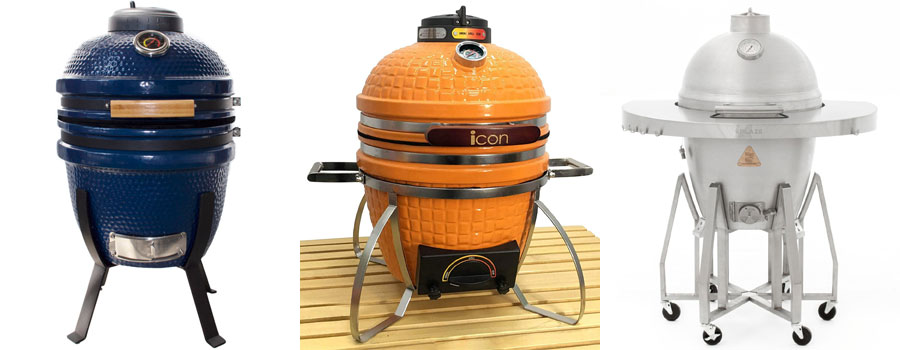
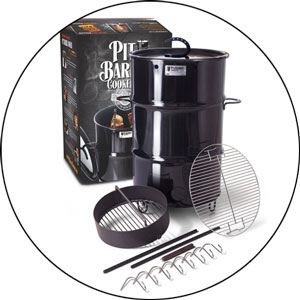
Parts and Components of a Kamado Grill
Most Kamado grills usually follow the same structure. They have very thick walls and vents at the top and the bottom. The ordinary Kamado consists of the following.
Upper-Air Vent. The main component that is responsible for the thermal regulation in the stove.
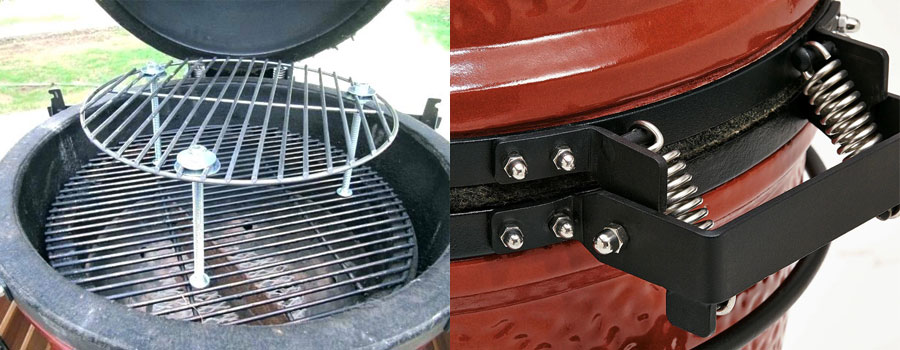
Dome. Keeps heat and smoke inside the grill to maintain temperature and, consequently, give your food a more distinct flavor. The hinge helps to open the dome since it tends to be very heavy, especially in more expensive Kamados.
Fire Box. That’s where you put charcoal. It has a hole in the middle for the airflow and consists of the fire ring and fire grate. By the way, if you are assembling the grill from the ground up, you can leave some gaps between the elements because they will later expand from the heat.
Fire Grate. Located at the bottom of the firebox. It has a lot of tiny holes on the inside for the ash to fall through. Its main point is to help you with cleaning after cooking. Additionally, it lets more air get through, which increases the burning of the charcoal.
Fire Ring. It is used to separate the grill grate from the rest of the firebox.
Thermometer. It shows the temperature based on its location. For the most accurate indicator of the heat, you must plug the thermometer right above the grill grate.
Draft Door. Responsible for the amount of air that flows through, which is essential for the temp control inside the construction. You can read more about thermal control later.
Ash Bin. This is a drawer where the ash collects. If you let it gather, it will clog your fire grate and make it difficult to control the temperature. Therefore, please be sure not to forget to check on it and empty it regularly.
Picking the “Fuel”
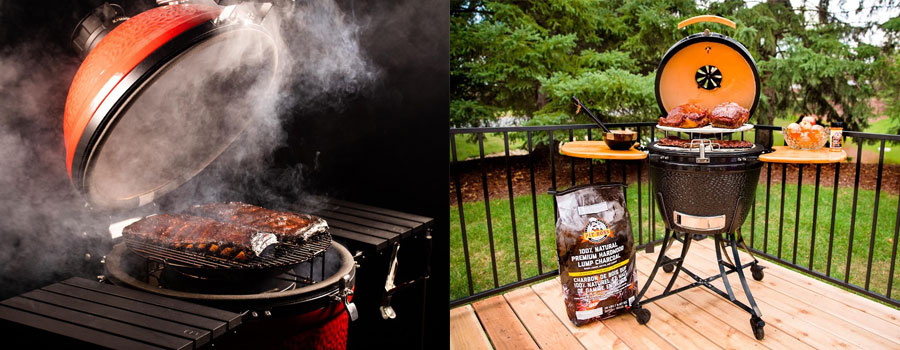
You need to understand how to light your Kamado grill and how to control the temperature for better results. For starters, the Kamado grill is fueled by charcoal. I strongly advise not to use lighter fluid and other toxic chemicals. Nowadays, you can effortlessly start your grilling without chemicals if you pick the right type of charcoal. There are two main types of charcoal: lump charcoal and briquettes. Briquettes offer a lower price, yet they don’t heat up very strongly and produce way too much ash. Lump charcoal is pricier, but it’s much better in every other way possible.
Lighting Up the Kamado
After you pick the right type of charcoal, you have three methods of starting a fire.
The first one is the electric starter. It’s an effective, albeit pricey way to start a kamado grill. However, if you have an electric charger, you don’t have to regularly buy new tinder. Also, the electric starter can become very hot, which makes it less safe than other ways.
For this method, you have to open all air vents, leave the grill’s lid open, and put charcoal into the firebox. Put the starter on the charcoal and wait for about 10-15 minutes before the charcoal gets grey, and the smoke emerges. Remember what I said about safety? After charcoal starts to burn, take the starter away and put it away to a safe place where kids and animals won’t find it. You can also add more charcoal to the already hot one to heat the grill up even faster. Close the lid and upper air vent until you get the temperature you need.
The second method is using lighter cubes. The cheapest way to light up charcoal. To start, open the lid and air vents, then add the right amount of charcoal. If you want to cook at a higher temp, then add more charcoal. Afterward, add no more than 2 lighter cubes and add fire. After about 10 minutes, when most of the charcoal gets gray, add some more charcoal and close the lid. After the grill reaches the temp, you can close the bottom air vent. As you can see, this method requires even less effort than the first one.
The last one is by using a chimney. To start cooking this way, you must place some paper (old newspapers will do the trick) at the bottom of the chimney and put charcoal inside. Then, add a few lighter cubes or a piece of paper and fire it up. After 10 or 15 minutes you’ll notice that the coals became grey. As you know by now, that means they reached the required temperature. Gather and place them inside the firebox and close the lid. You can control the air vents to regulate temp to your liking.
Overall, I think that lighting up a Kamado with lighter cubes is the easiest, fastest, as well as cheapest way to do it. However, firing it up with chimney charcoal has its benefits. For example, it allows you to get large amounts of charcoal to burn up evenly. Additionally, all the ways described above don’t use any toxic materials or additives that can negatively impact the taste of your food.
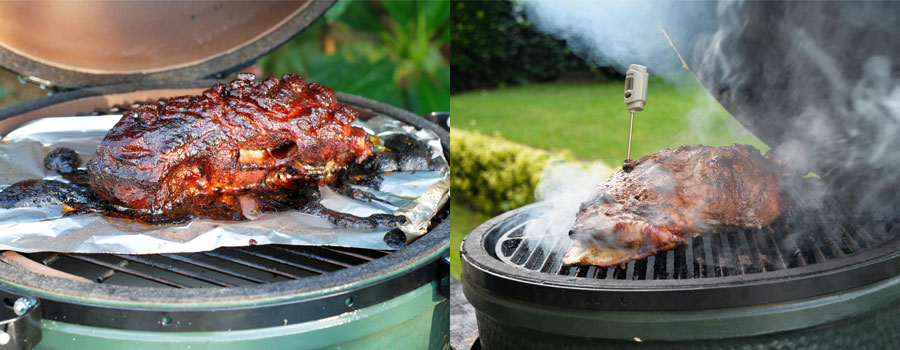
How to Control Temperature

After you fire up the Kamado, the temperature inside will start becoming warmer every second. To control and maintain the desired temp, you just need some practice and understanding of the basics. The key to temperature control is airflow. Kamado cooks use all sorts of methods to control heat, like using ceramic insert between grill surface and burning coals. The more oxygen you use, the hotter the temperature inside the grill will get, and the faster the charcoal will burn inside.
Therefore, the temp depends on the amount of oxygen that goes through the firebox and the amount of charcoal you put inside the grill. For example, if you want to cook for an extended time at low temp, you should put in a small amount of charcoal and continuously add new ones as the cooking goes along. The lid of the grill must be closed when you start cooking. You may open it every once in a while but only to lose cool it down. After you close the lid, open all air vents until your grill heats up close to the temp you want. When it’s almost there, close the air vent at the bottom but leave the upper vent slightly open.
If the temp does not stabilize, you may want to adjust it manually by controlling air vents. If it’s too hot, then open the top air vent a little. If it gets too cold – close the top air vent instead and open the bottom one. The key here is to monitor the thermometers to get the desired level of heath.
The process is a little different if you want to smoke your meat. Start with a small amount of charcoal, and once Kamado gets hot, it’ll stay at that temp for a long time. It’s important to note that ceramic stoves hold heat much better than their steel and aluminum counterparts. You can add a little more coal as time goes by to increase the temperature. Remember that for higher temp searing, you need to use fresh charcoal. Also, it’s much easier to raise the heat than it is to make it lower, so be very careful when you start cooking!
Additional Accessories
If you want to take your cooking to the next level or just make it more convenient, you should consider getting some supplementary tools:
- Digital thermometer. It’s a handy tool that can show you the temp level inside the meat. It’s also much more accurate than standard lid thermometers. If you tend to make thick slabs of meat, then digital thermometers will help you to make sure that it won’t remain raw inside.
- Jalapeño rack. It is also a definite must if you like stuffed jalapeños.
- Smoking stone. A ceramic tool that you can place between the fire and the meat. It’s worth noting that most grills have it pre-installed, but if your Kamado doesn’t have one, then it’s a must-buy.
Safety Tips

Remember to operate your Kamado properly, always mind the level of heat, and keep it clean. Here are some general tips for operating your grill more safely:
- One of the most dangerous things your grill can pose is a flame surge that happens when you open the lid too quickly. To prevent it from happening, open both vents, wait around 5 seconds, and only then raise the dome very slowly.
- Keep your children and pets away from the grill and electrical starter (if you have one).
- Don’t try using Kamado indoors because it’s simply isn’t made for indoor cooking.
- Do not move it when it’s still hot or has ash inside.
- Wait until your ash cools down before cleaning.
- Don’t use liquids to light the charcoal.
- Keep it clean.
Maintenance
Kamado grills need good care if you want to extend their lifetime, as well as for the safety measures. I recommend making a full seized cleaning at least two times a year. The good news is that it can basically clean itself. Just start it, let it heat up, and the grill will sterilize. Close the lid and bring it to about 650 degrees of Fahrenheit. Make sure it’s heating for up to an hour. Afterward, open all the vents and let them cool off, preferably overnight. Then, remove all accessories and racks before emptying the ash drawer. Remove the fire ring and firebox.
Get the brush and clean every part of your grill. In the end, spray the grill with the cooking spray or mineral oil. Now, your Kamado is ready to be reassembled for more cooking. I hope this guide will help you to get accustomed to the Kamado. Remember, that practice makes perfect! Therefore, don’t procrastinate. Be sure to check some recipes online and start experimenting right away!
Tags: #kamado grill / #kamado joe grill / #best kamado grill / #akorn kamado grill / #kamado grill reviews
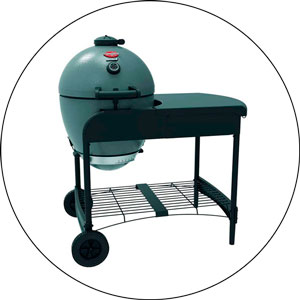
We love the whole family to get out into the nature, fry kebabs, vegetables, bake fish, pork steaks and ribs. An indispensable assistant in this is the Primo Junior “All in One” grill. It is quite mobile, due to the fact that it is not very large, it folds well and unfolds. The wheels are another advantage, so it can be easily moved to the right place. Convenient to operate, quickly ignited. You can cook on it anything, as it is multifunctional. Due to the fact that krill is made of ceramic, the food cooked on it remains juicy, tender, but at the same time with a beautiful golden crust. I also want to note that ceramics will last a very long time because it is made in the USA by a company that deals with them (ceramic grills) very much … Primo is a common name for grills in the USA. Due to the oval shape of the grill, we cook vegetables and meat at the same time, because there is the possibility of separation of zones. At the same time, vegetables are not carbonized, and meat is not raw. It is very comfortable. Primo grill “All in One” is not a cheap thing, but the American quality justifies itself completely, I’m not sure that you can cook food of similar quality on Chinese counterparts. For our family, lovers of a tasty meal in nature, these are important nuances.
We begin to prepare for the summer season – we bought a Monolith Junior grill with my husband. We chose this model because of its compactness, and just enough for our small family. We bake vegetables in it, tasty mushrooms come out, my husband prepared wonderful fish. There is already no barbecue compared to when there is such a grill. The children really liked it, especially the pizza, and the food was not at home, but like from a twinkle, in the woods, with aroma and amazing taste.
Yes, I agree. On New Year’s Eve, friends and all lovers of aromatic barbecue gather at our place. I prepared a surprise for them – I bought a Monolith Classic grill. I could not resist and on the first day roasted duck in it. Neither in the brazier nor in the oven would such an effect have been obtained. The meat is tender, juicy, and most importantly fragrant, as it happens at the stake. It’s just that cooking is much simpler and there is no need to build a special hearth. Excellent result, to be honest, I did not even expect this.
I just love to cook kebabs, different from all types of meat. This grill is everything to me. Friends know about my passion for cooking barbecue, so a friend showed me Monolith Classic in the online store. I immediately bought on his recommendation, I knew and hoped that my kebabs would be tastier than usual. There were no special expenses, I’ll say only one thing — the grill will have to be budgeted for any middle-class family. I cook, rejoice, and most importantly, a first-class grill, ceramic. There are no spots, like from the old barbecue, on which I will no longer cook. I advise everyone, it’s just a super unit!